
I just received some old MOS 6502 microprocessor chips from AliExpress, for a project that I’m currently working on.
Now, I needed a way to test that the received chips were actually functional.
Having already built several Motorola CPU NOP testers, it was now time to build a 6502 NOP tester.
Join me, as I discuss supporting both MOS 6502 and WDC W65C02 CPU’s in a project, then building a CPU NOP tester, and finally using it to test my old MOS 6502 chips and a new W65C02 CPU chip.
For my own 6502 based project, I wanted to ensure it would support original 6502 CPU chips, as well as the currently produced WDC W65C02 chips.
Hence, why I wanted to get my hands on some recovered MOS 6502 chips, so that I could fully test my project with both an original 6502, and with the modern W65C02 chips.
The modern WDC CMOS 65C02 has a few different pin assignments than the original 6502, so some allowance for this needs to be made when making a 6502 based CPU card.
The most notable differences (for my requirements), are pin 1 and pin 36.
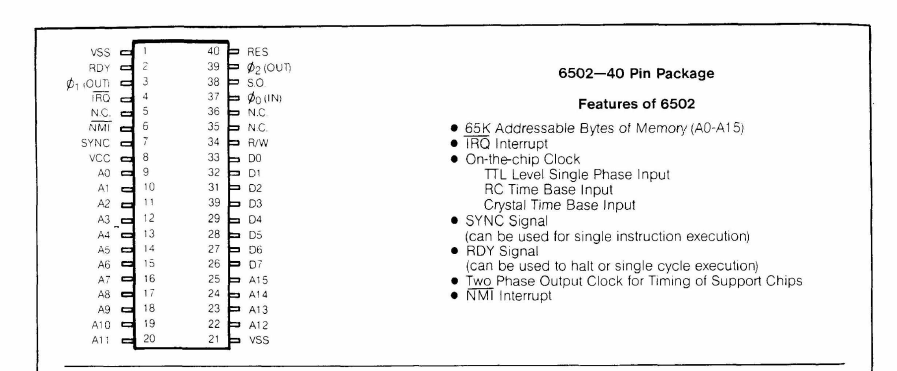
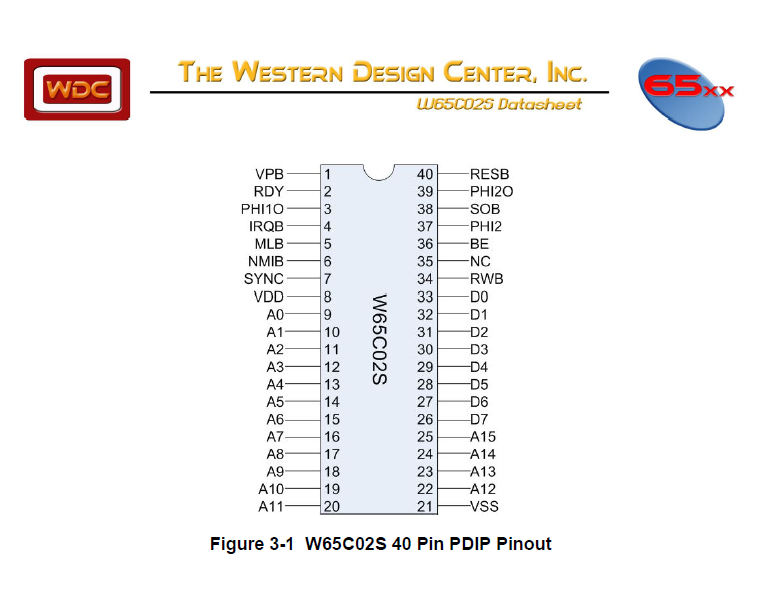
As can be seen on the pinout diagrams, pin 1 on an original 6502 is a ground pin (Vss), whereas on the WDC W65C02, pin 1 is an output.
Pin 1 is the W65C02’s Vector Pull output, which can be used to enable supplying an interrupt vector to the CPU during an interrupt sequence.
Pin 36 on an original 6502 is a No-Connect (NC) pin, whereas on the WDC W65C02 pin 36 is the Bus Enable input, which needs to be pulled-high for normal CPU operation.
Typically, a couple of jumpers would be used on a PCB, to correctly support using either CPU in the project.
One jumper to allow connecting pin 1 to GND (for an original 6502), and one jumper to allow pulling pin 36 high (for a WDC 65C02).
Arguably, you could perhaps just pull pin 36 high, permanently. But, it’s a normally accepted practice that when a chip pin is marked N.C. on the datasheet, it means just that. i.e. Don’t connect that pin!

The five MOS 6502 chips that I received from AliExpress came in a padded envelope, simply wrapped in some plastic cling film.
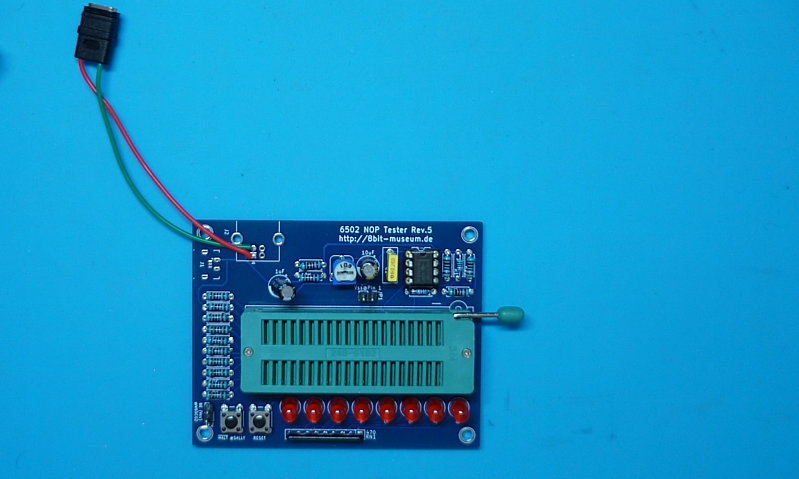
To check whther the received chips might actually be working 6502 CPU chips, it’s time for me to build the 6502 version of the 8-bit Museum’s various NOP tester boards.
You can find more information about these CPU NOP Testers at: https://8bit-museum.de
If you’ve seen my earlier posts or videos, you’ll probably know that I’ve previously built some Motorola CPU NOP testers.
I’d built a couple of 6809 CPU testers, to allow me to test and sort 6809E (external clock) chips from the original internal clock 6809 (non E suffix). These particular CPU chips appear to often be mis-marked by AliExpress suppliers.
Also, I built a Motorola 6800 NOP tester, which I’ve used for verifying my old 6800 microprocessors, for another project.
Now, I’ve laid out across my deskpad all the parts that I need to put together the 6502 NOP tester.
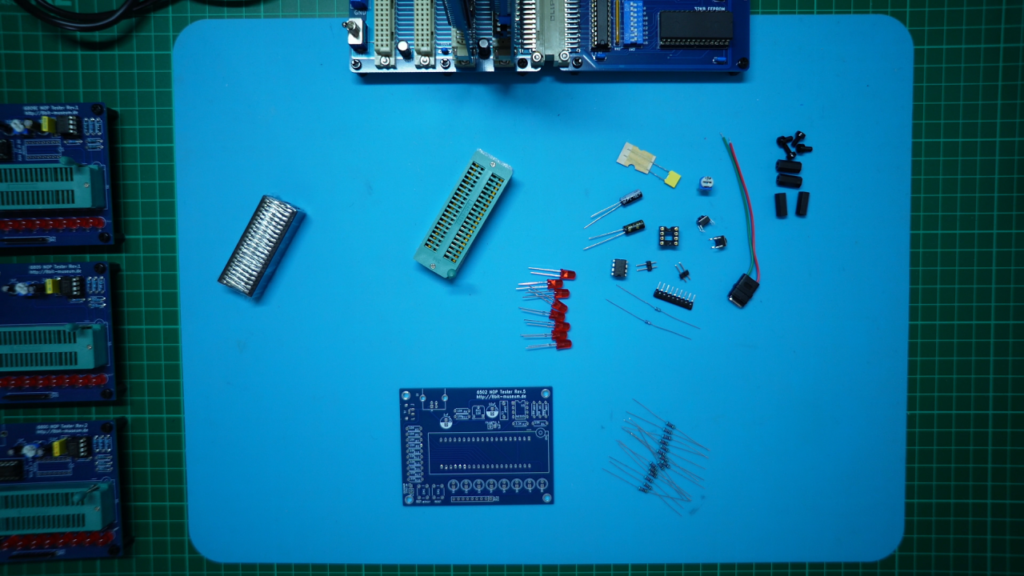
Interestingly, the 6502 NOP tester PCB also includes two jumpers, for the reasons I outlined earlier.
i.e. To control the CPU’s pin 1 and pin 36 connections.
This allows the 6502 NOP tester to also be used for testing either original MOS 6502’s or the newer WDC 65C02 processors.
So it was time to get busy, to get this NOP tester built. Then I’ll be able to verify if I actually have some possibly operational MOS 6502 chips!
First, I started soldering in the resistors, being the lowest profile components.
Then, I soldered in the 8-pin IC socket. Next, I inserted the eight LED’s. Then the 2-pin headers. Then the capacitors. Next, the potentiometer. The two push-button switches. Then the 40-pin ZIF socket.
Finally, I attached a power lead connecting a USB-C socket, which is my currently preferred connector for 5 volt power input.
With assembly now complete, we just need to insert the 555 timer chip (that supplies the clock), and then we’re ready for an initial test.
So, it was now time to unwrap the plastic cling-film around the received MOS 6502 chips, so we could get the first one inserted into the tester’s ZIF socket.
We also needed to insert the pin-1 to GND jumper, as required for an original MOS 6502 chip.
Next, I plugged-in 5V power, to see what happened.
Unfortunately, we didn’t get the expected LED pattern with the first MOS 6502 tested.

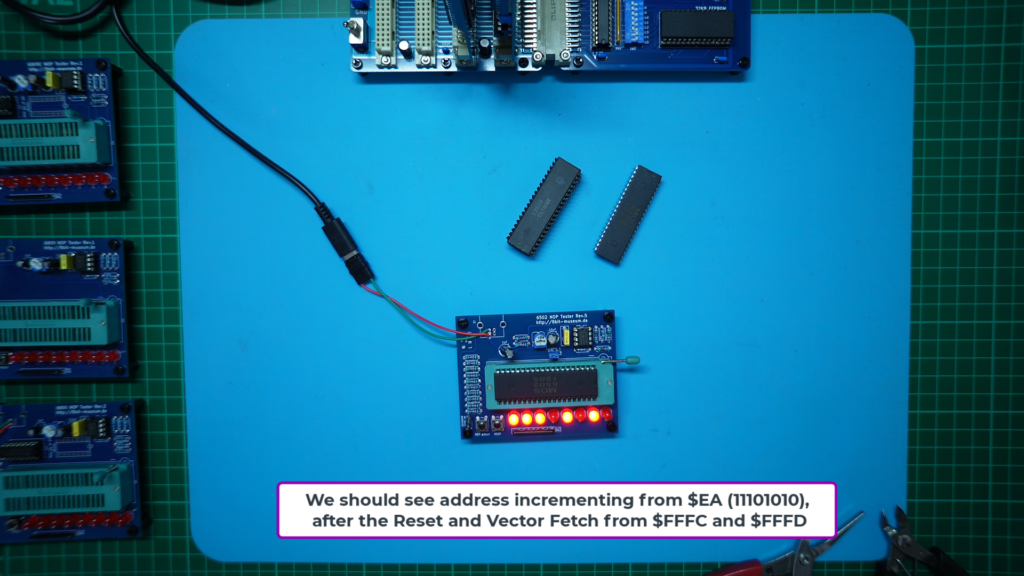
I then tried the second MOS 6502 chip, and this finally gave the expected results.
We have the LED’s counting through the incrementing address bus, which starts from address $EAEA, as $EA is hardwired on the data bus of the NOP tester, being the opcode for the NOP instruction on a 6502.
Testing the other three 6502 chips, we discovered we also had a second failed chip. Therefore, it appears only three of the five received MOS 6502 chips are likely to be good, with two failing the NOP test.
So, that makes a rather disappointing 60% success rate on the AliExpress sourced MOS 6502 chips! A lesson that when sourcing recovered retro chips from AliExpress, you should probably always order at least twice as many as you actually need!
Lastly, I tried my newly built 6502 NOP tester with a brand new WDC W65C02S CPU, which I also had.
To do this, firstly I needed to remove the previously inserted pin-1 to GND jumper, and move the jumper over to the pin-36 “Bus Enable” jumper.
Then, I inserted my brand new W65C02 chip, recently received from Mouser Electronics, and I again applied power.
As expected, this tested out okay, with the WDC CPU responding exactly the same way as the three good MOS 6502 chips. This also provided additional reassurance that the three responding MOS 6502 chips are probably okay.
So, it looks like I now have a set of successfully NOP tested 6502 processors to allow testing my next project.
Next, I’ll get on with finishing my 6502 CPU Card project.
Until then…