
Several years ago, when I was re-discovering my original digital electronics design and breadboard prototyping background, I decided there was a need for a better LED indicator solution.
This resulted in my 8-bit LED Thing, which has proven to be a popular item, and has given me great satisfaction to see others using them also.
So, more recently, I was again working on a digital breadboard project. In this case for my MECB bus based 8-bit retro platform. And, despite having used my 8-bit LED Things regularly, with various projects, for monitoring registers, inputs, and outputs, I had a sudden thought: Wouldn’t it be great, if…
Introduction
A couple of years ago, I released my 8-bit LED Thing.
I’d previously been using my 8-bit LED Things for a few years, before finally deciding to share it.
My thinking then, was that others might get similar benefits from using it.
I still use them regularly. In fact whenever I need an LED for a breadboard project, I reach for my 8-bit LED Things.
Simply, because they’re so easy to connect-up and use. Noting also, that they provide a virtually no-load LED indication for my digital creations.
They have in-fact proved to be a popular item, and it has given me great satisfaction to see others using them also.
If you’re not familiar with my 8-bit LED Thing, then I do recommend first reading that blog entry, to familiarise yourself with what it’s all about, before continuing.
A sudden thought…
So, recently, I was again working on a digital breadboard project. In this case for my MECB bus based retro 8-bit platform.
Despite having used my 8-bit LED Things regularly, in various projects, for monitoring registers, inputs, and outputs, I had a sudden thought…
Wouldn’t it be great, if the LED Thing could also show me the Hexadecimal value of a multi-bit signal, as well as just the existing LED bar graph (which it currently displays).
Now, I know that most of us retro computing and digital electronics enthusiasts, know instinctively what the Hex value of a 4 bit signal is, just by looking at it. But, I just had the thought of how cool it would be, to also display this.
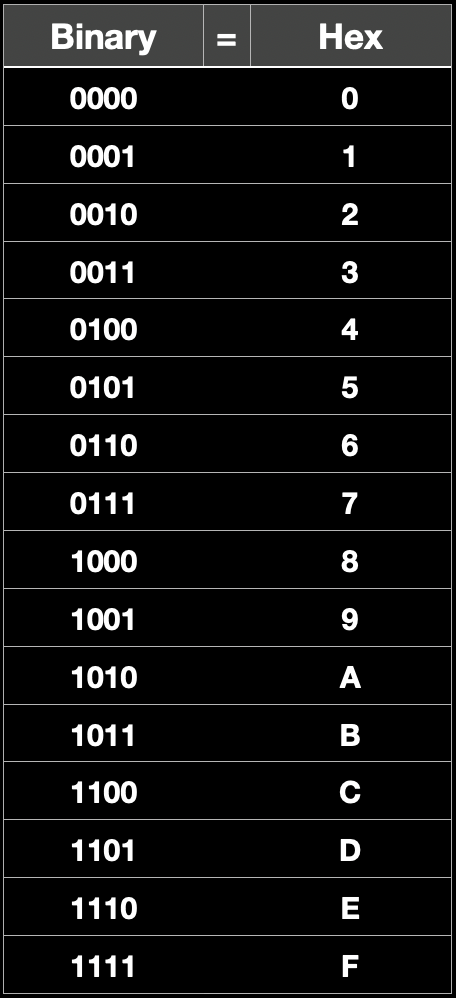
Not only would it look great on my breadboard, it would also remove the need to use any brain power, in translating LED Bar Graph binary values to hex values, for your multi-bit register contents.
A new sibling for the 8-bit LED Thing
So, without further ado, let me introduce my new 8-bit OLED Thing. I think it is a nice addition as a sibling to the existing 8-bit LED Thing.
I’ll still continue to use, and offer, my original 8-bit LED Thing, as it still remains a good option, if you just need a LED Bar Graph, or some simple LED indicators.
But, if you want to take the 8-bit LED Thing up a level, or, perhaps you just want a really convenient and tiny STM8S development board, then I think you’ll really like my new 8-bit OLED Thing!
Also, if you’re already using 8-bit LED Things, then you can simply swap-out for a new 8-bit OLED Thing, to get the new display capabilities, as they both use the same package size, power and 8-bit input pin-out etc.
So, on my workbench you can see my new 8-bit OLED Thing, on a breadboard alongside an existing 8-bit LED Thing.
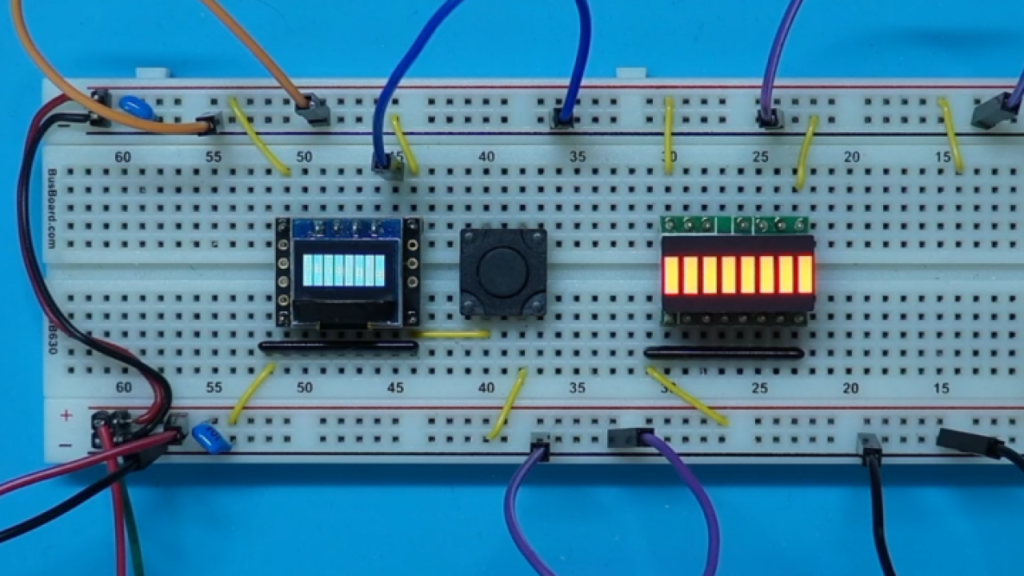
I thought this was the easiest way to compare the two.
To start off, I’ve jumper’d the OLED Thing for it’s Bar Graph “only” mode, which is effectively just duplicating what the original 8-bit LED Thing displayed. i.e. A simple 8-bit bar graph representing the state of it’s 8 inputs.
Firstly, you’ll note that the new 8-bit OLED Thing is the exact same overall size as the existing 8-bit LED Thing.
i.e. A 0.5” wide DIP16 package.
Secondly, you’ll note the display itself is in fact a bit smaller.
This is basically because, instead of a simple DIP16 LED Bar Graph display, I’m now using a 64 x 32 matrix OLED display, which has a display sized for the 2:1 aspect ratio of 64 x 32 pixels.
Now, I’ve connected a pull-up resistor bank to both their 8-bit inputs, so that all of the display segments are on.
I’ve also wired-up a momentary bush-button switch to pull one of the inputs of the 8-bit OLED Thing to ground, so you see what the OLED bar graph display looks like when one segment is off.
Let’s take a look.
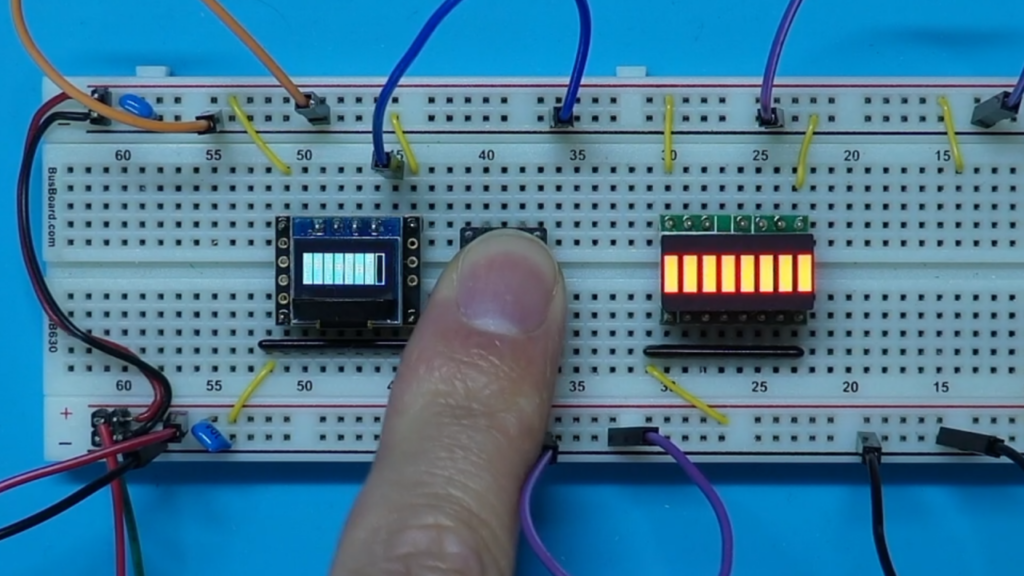
So, in this mode, the 8-bit OLED Thing pretty much does, what the LED Thing already does, but with a OLED display, instead of a LED Bar Graph display.
But, that’s not it’s default mode!
8-bit OLED Thing “default” mode
The 8-bit OLED Thing has a couple of mode pins that are brought out to the breadboard. Both of these have internal pull-ups, so when left unconnected, the 8-bit OLED Thing is in its default mode.
The default mode, displays the Bar Graph input status, as well as my earlier envisioned Hex value, of the 8-bit inputs.
So, let me pull-out the mode grounding wire, and you can now see the 8-Bit OLED Thing, in it’s default mode.
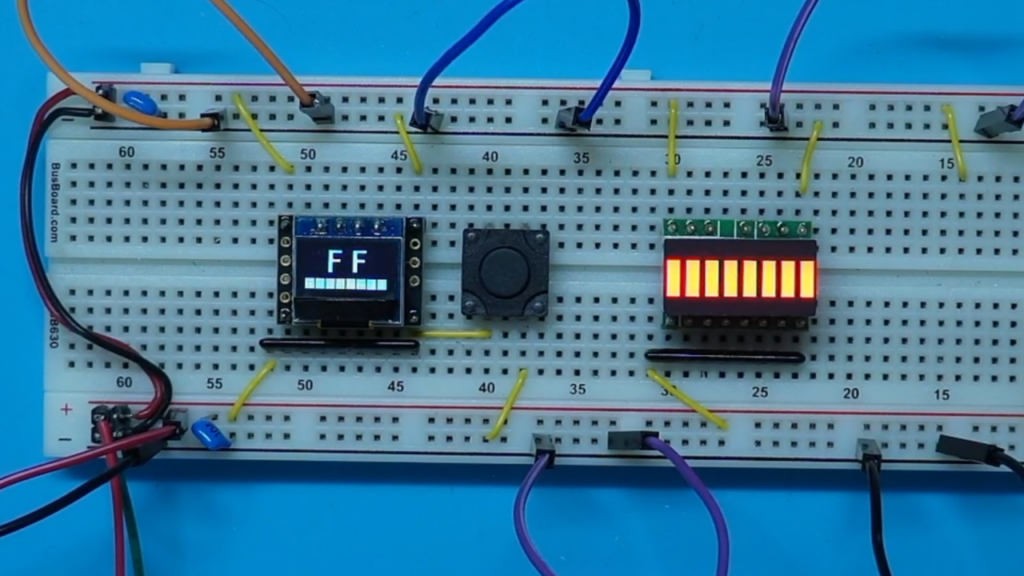
Awesome.
Now, when I again push the button, the Hex value updates, to correctly reflect the new 8-bit input value.
Another mode…
Now, I mentioned there are 2 mode input pins. So, the one mentioned above was the Hex enable pin, which by default is enabled (internally pulled high).
The other mode input pin is the Bar enable pin, which is also, by default, enabled.
If I now ground the Bar enable pin, you can see we have now disabled the Bar Graph display, and we’re now using the full display area (with a bigger font), to display only the Hex value of the 8-bit inputs.
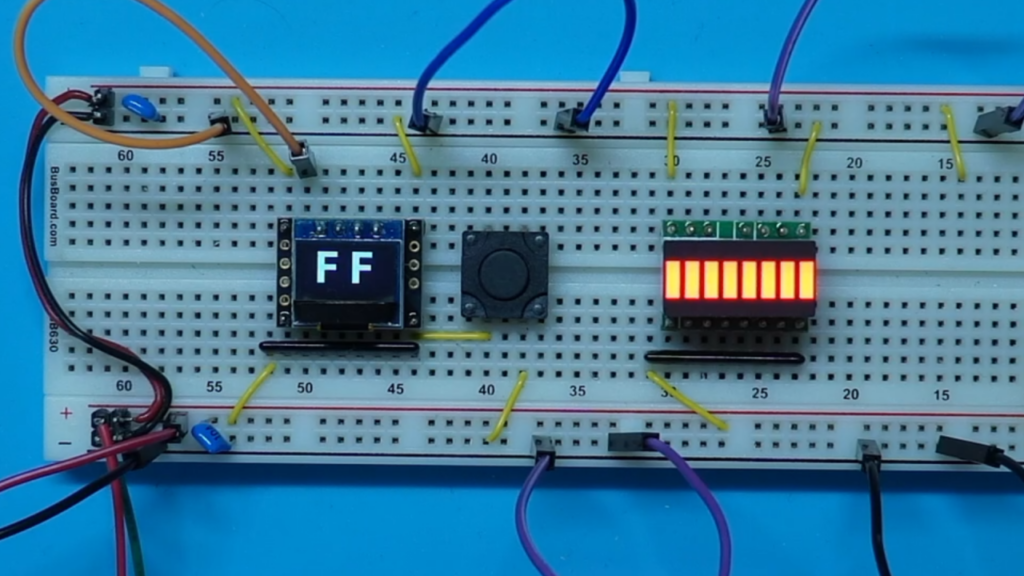
So, I think this is a worthy upgrade to the original 8-bit LED Thing’s capabilities. Especially for projects where you are displaying the contents of binary registers etc.
One more “Special” mode…
Now, those of you who are thinking ahead, have probably got the question in their mind, of, what happens when both mode pins are pulled low?
Good question!
From what I’ve showen you already, you’d think I’d end up with a blank display.
i.e. Both the Bar Graph disabled (not displaying), and the Hex value disabled (not displaying)!
So, to solve this illogical 4th mode combination, I’ve implemented a special feature, similar to one of the special features of the existing 8-bit LED Thing. Only now, this feature has also been upgraded from “Cool” to “Awesome”!
Some of you might remember that the 8-bit LED Thing implemented a special electronic Dice mode.
However, the 8-bit LED Thing was limited to its bar graph display for showing Dice roll values.
So, lets look at the new 8-bit OLED Thing electronic Dice implementation.
If I ground both the Bar & Hex mode pins, you can now see, thanks to the matrix display, we have a familiar dice face on the display.
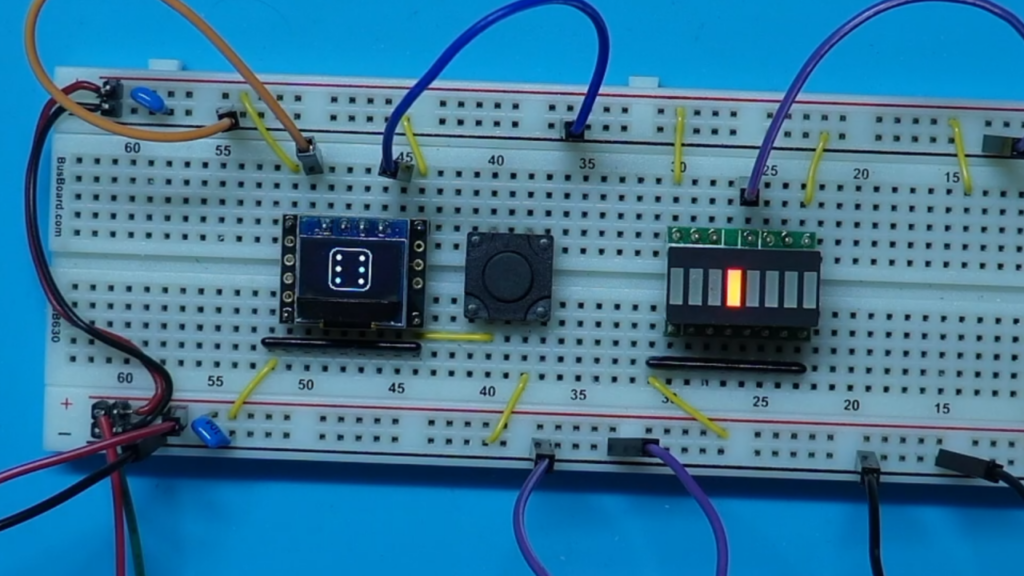
Now, what I’ve done for the OLED Thing, is that when I change to Dice mode, I also enable all of the internal weak pull-ups on the 8 input sensing pins.
In this way, a dice roll is initiated, simply by pulling down any of the sense input pins.
Also, the dice continues to roll for as long as I hold the button down.
When I release the button (so all inputs are again pulled high), the roll finally slows down and comes to a stop.
So, you could actually make yourself a nice little electronic Dice, with just a 8-bit OLED Thing, and a momentary push-button (perhaps instead even a tilt switch… hmm…).
Another use for the 8-bit OLED Thing
Okay, that pretty much covers my new 8-bit OLED Thing’s pre-programmed functionality.
But there’s another use, that the 8-bit OLED Thing enhances, above and beyond the original 8-bit LED Thing.
That is, using the 8-bit OLED Thing as a tiny-sized STMS8 development board, for your own projects.
This was possible with my original 8-bit LED Thing, but the new 8-bit OLED Thing has a few advantages.
Firstly, I now bring out all 20 pins of the STM8S microcontroller, to the solder pads around the edge of the PCB.
The design also has no need to reserve some of the pins for the LED Bar Graph display charlie-plexing, as was used on the 8-bit LED Thing.
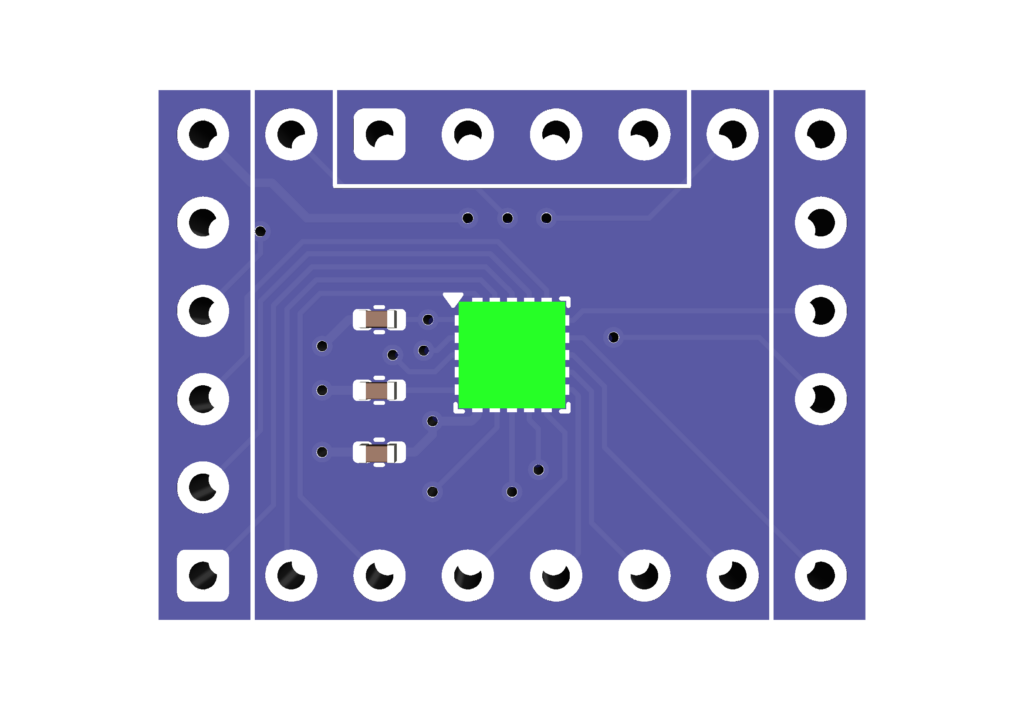
Secondly, I went to the extra expense of an ENIG finish to the board surface, which provides a more attractive and robust solder pad finish.
Even just using as an 8-bit OLED Thing, the ENIG finish looks really nice on the unused solder pads on each side.
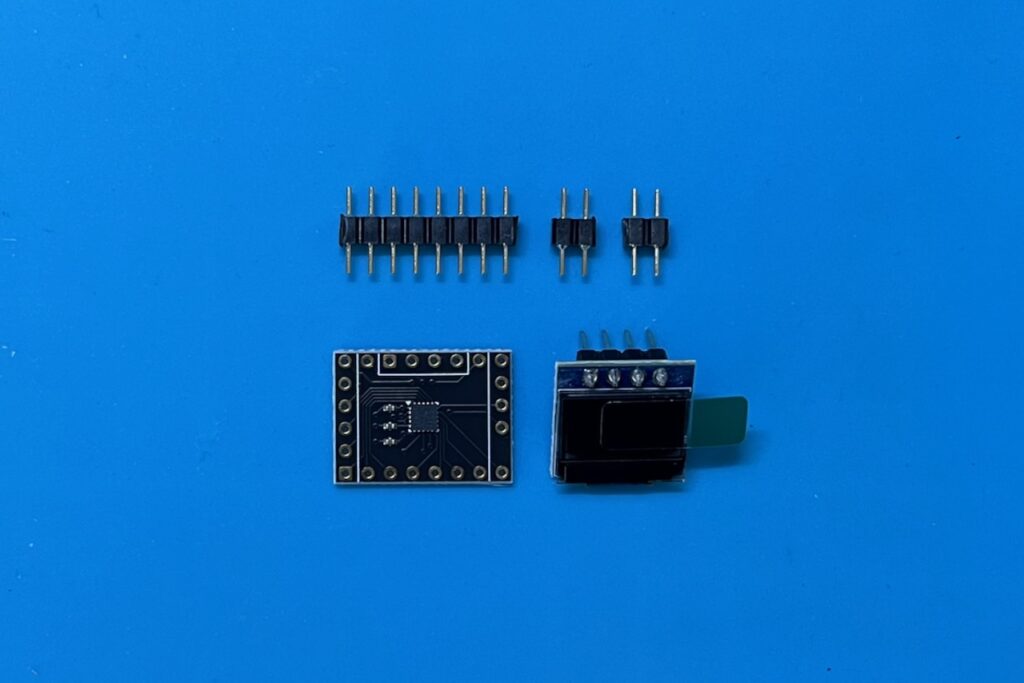
Another thing that I have done, by design, is to make the Kitset’s OLED module a simple (tight) push fit.
This means that you can assemble, and use, your 8-bit OLED Thing, without actually soldering the OLED display module in place.
This has two advantages.
Firstly, you can choose to not solder the OLED Module in place, and leave open the possibility of later using your 8-bit OLED Thing, as a general STM8S development board, including if you want to remove the OLED module for your application.
Secondly, the tight push-fit OLED module assembly, ensures that if you want to permanently solder the OLED module in, it is held in-place, in a perfectly flat position, to make soldering it in, effortless!
STM8S microcontroller development
Finally, for use in your own STM8S based microcontroller projects, note that for development I am using the ST Visual Develop IDE for developing STM8S applications.
ST Visual Develop for STM8, can be found here.
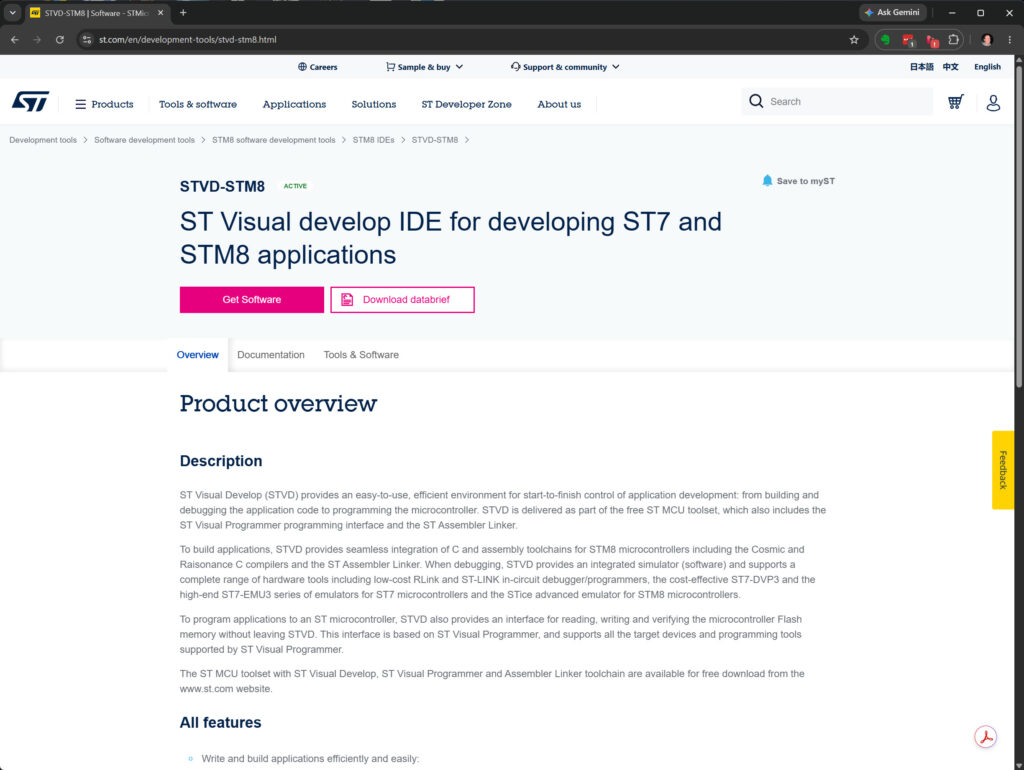
In addition, I use the Cosmic C compiler, which seamlessly integrates with the ST Visual Develop IDE.
The great thing is that these development tools are quite powerful, and are available for free.
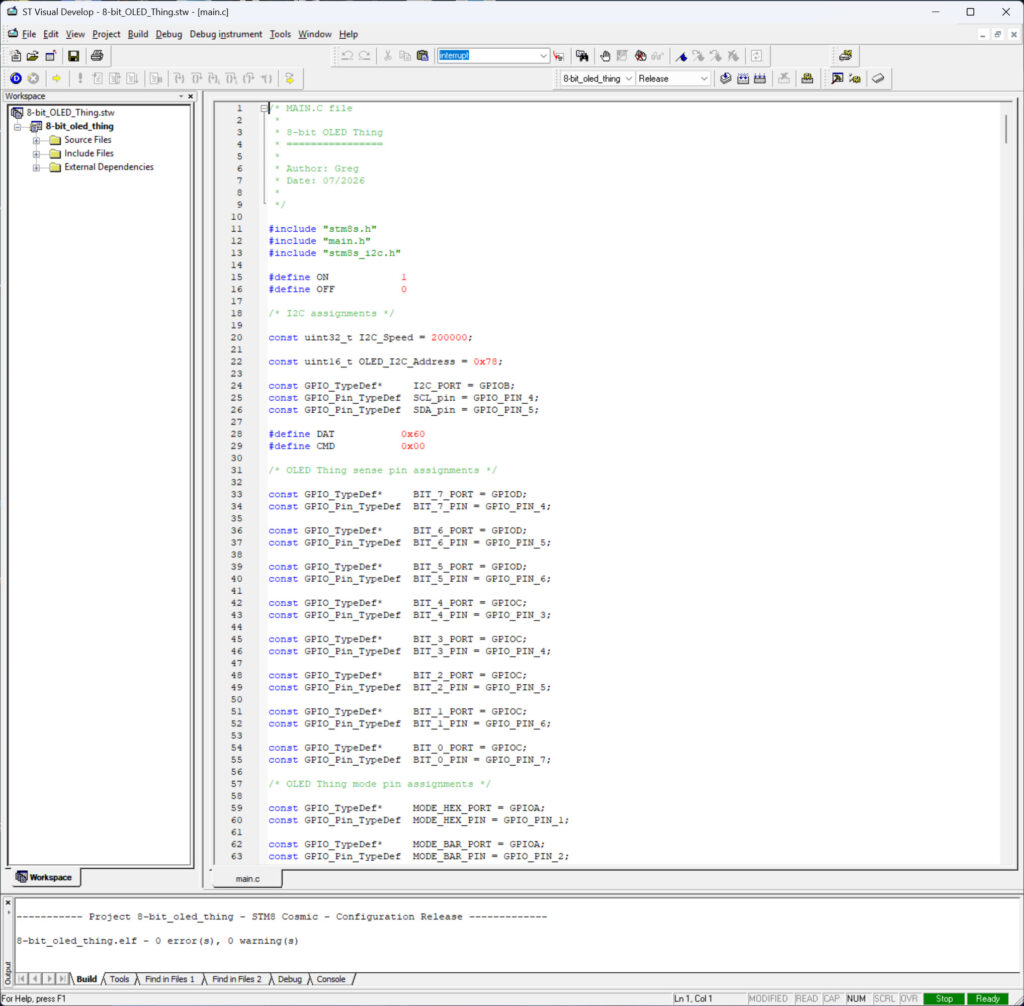
Here is the head of my 8-bit OLED Thing code in ST Visual Develop, to help visualise using ST Visual Develop.
You can easily get started by visiting the st.com website.
Hopefully this helps you with getting started with STM8S development.
“8-bit OLED Thing” Kitset
Okay, so earlier above, I posted a photo of the parts than make-up a 8-bit OLED Thing kitset.
As you have seen, the main PCB is small. Populated with the tiny 3mm square QFN packaged STM8S microcontroller, and a few tiny 0402 surface mount components. It’s only the size of a 0.5” wide DIP16 package.
The full kitset, consists of the populated PCB with the microcontroller pre-programmed & tested, together with gold plated round-pin headers, and our 64×32 pixel OLED display module (with a pre-mounted 4-pin header).
For a demonstration of kitset assembly, be sure to watch the linked video.
In summary, I just need to solder in the header pins. The 8-pin header on the 8 sense inputs, and the two 2-pin headers for the power and mode pins.
To simplify soldering them in straight, I mount the headers in a breadboard, and then drop on the PCB, which makes it easy to solder them all in place.
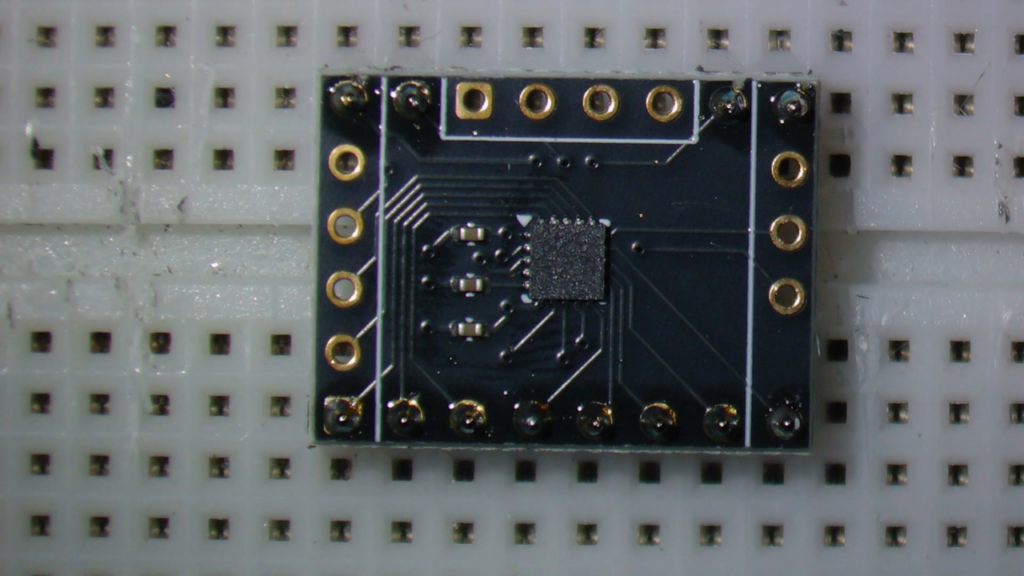
With the header pins soldered in, you now just need to push-in the OLED module 4pin header.
As noted earlier, I intentionally designed this to be a firm push fit. Therefore, soldering it in-place is optional!
And there we have it, a fully assembled 8-bit OLED Thing. Incredibly easy!
A few more things…
Now to finish off, I’ll show you a few more things.
Firstly, the underside of the PCB.
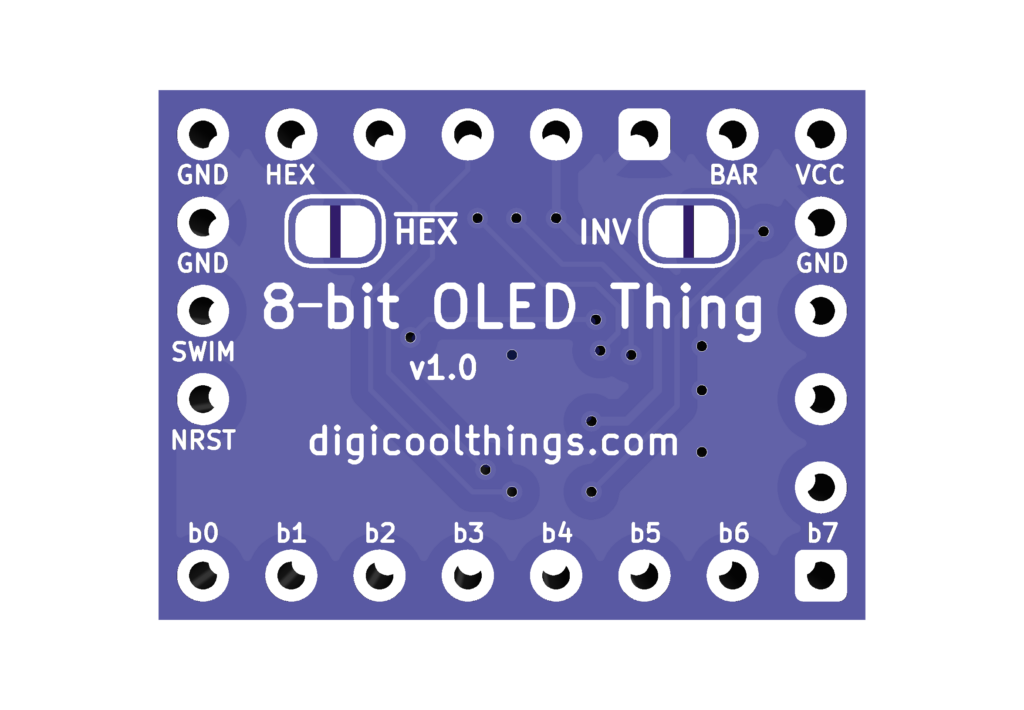
Here, you’ll note I’ve implemented a couple of solder-pad jumpers.
One is for disabling the Hex mode. So, you can actually permanently setup your OLED Thing to be only in Bar Graph mode, just like the original LED Thing.
It effectively just shorts the Hex mode input to ground, the same as externally shorting the pin to ground.
The other jumper pad is to short a 3rd mode pin to ground.
This extra mode pin is called INV which is for inverting the display.
I don’t use it, but some people might prefer the OLED display to be inverted. i.e. Black on a white background, instead of white on a blank background.
But, for me, I prefer the default non-inverted display.
Lastly, here is the laminated hand-out that I’ll provide with each 8-bit OLED Thing order. It nicely illustrates all of the connections and modes.
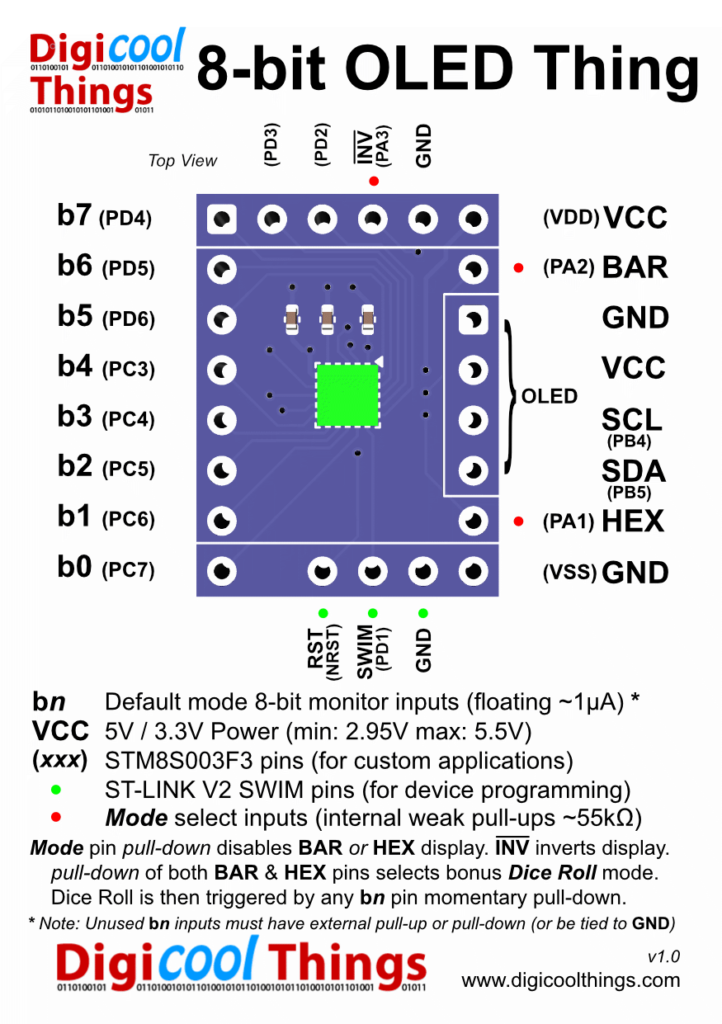
Resources
As usual for my projects, you can find resources for this project on my DigicoolThings Github.
The Github project repository can be found here: 8-bit OLED Thing
Here you’ll find 8-bit OLED Thing resources – Schematic (pdf), Handout (png) and Firmware.
Most notably, if you did use the supplied microcontroller board for your own projects, and then wished to return to the 8-bit OLED Thing functionality, you can just re-program the microcontroller with the 8-bit_oled_thing.s19 file.
Likewise, if I update the firmware in future, the latest released version will always be found on the Github repository.
Summary
Okay, I hope you enjoyed my new 8-bit OLED Thing.
If’ you’d like one (or more) to play with, you’ll find it on my Online store.
Also note, as I did with the 8-bit LED Thing, there is a 4-up quantity break, for those who’d like a few to play with, or would like multiple to enhance their project creations!
The original 8-bit LED Thing is also still available.
Have fun!