
The 6502 Card was my second CPU Card, designed for the Minimalist Europe Card Bus.
It was also a key component for my “CreatiVision Console re-Creation” project, which I’m currently enjoying using.
Recently, I completed my “CreatiVision Controller” project. This will be the subject of a “Part 2” CreatiVison re-Creation video, which I am currently working on completing, to share my journey.
In the meantime, this short Post / Video is just to update you all on the latest 6502 CPU Card revision, which brings it to version 1.3.
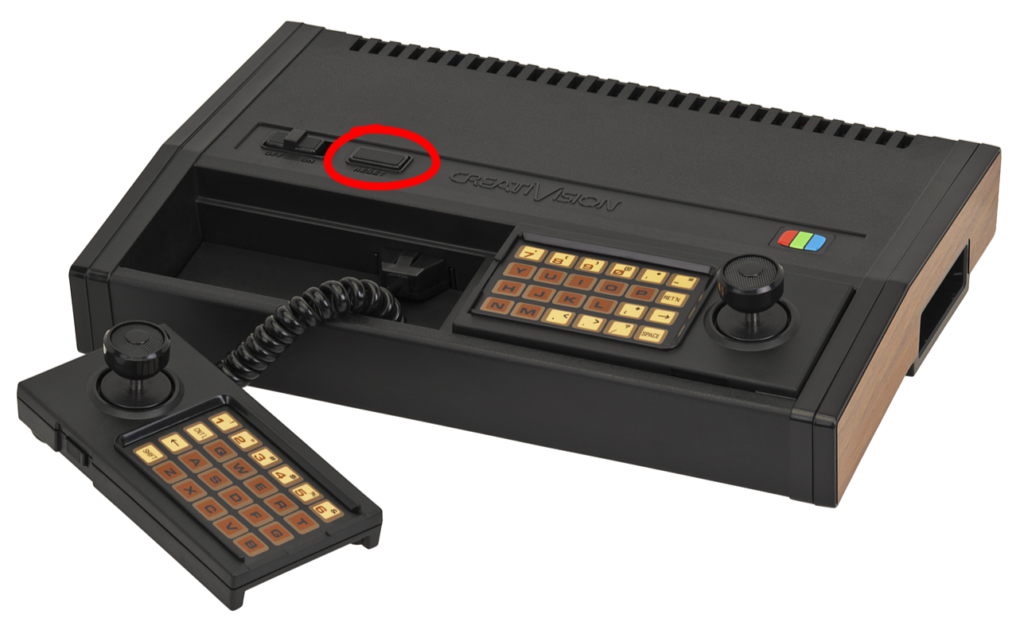
While testing my CreatiVision Controller, I realised that the crucial “RESET” button, on the CreatiVision Console was actually connected to the 6502’s Non-Maskable Interrupt (NMI) input.
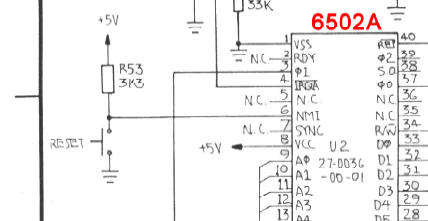
I’d forgotten that this “Reset” button needs to be pressed, in order to play a game.
So, it’s not actually a hard Reset, as you’d easily assume from the button’s “Reset” label.
Therefore, in order to initially test my new CreatiVision Controller with my MECB CreatiVision re-Creation, I had to bodge triggering a Non-Maskable Interrupt with a jumper-wire attached to the bus header on my MECB Prototype Card.
However, this was only a temporary stop-gap measure, to get me up and running.
A link wire to trigger NMI is not ideal! Particularly since your Non Maskable Interrupt push-button should really be de-bounced, otherwise you’ll potentially be creating multiple interrupts at every button press!
So, to properly resolve this, and also to provide for other 6502 CPU Card applications that require a Non-Maskable Interrupt button, I’ve made an update to the existing MECB 6502 CPU Card.
This adds a debounced NMI push-button and NMI button header, to add to the existing Reset push-button and Reset button header.
Now, there are several ways I could have implemented the desired de-bouncing of the NMI push-button input. However, after thinking through the most suitable debounce circuit to use, it occurred to me that the simple 8-pin Dual In-Line TC1232, that I was already using for the Reset controller, would also be perfect for a manual NMI push-button debounce.
The TC1232 is relatively inexpensive, requires no additional components, and provides a nice manual push-button debounce function. Besides, if you bought more than one TC1232 for your CPU Card assembly, then you probably have a spare one (or two), in your parts drawer, like I do.
In case you’re thinking: Hang-on this a Power-On Reset controller, and we don’t want a power-on Non-Maskable Interrupt!
Well, this is not a problem, as the CPU’s NMI input is falling-edge triggered, not level-triggered. Since a falling-edge can’t happen until we have a high-level to start with, the first Non-Maskable Interrupt won’t happen until the Power-On Reset has completed, and you then press the NMI push-button.
So, all is good!

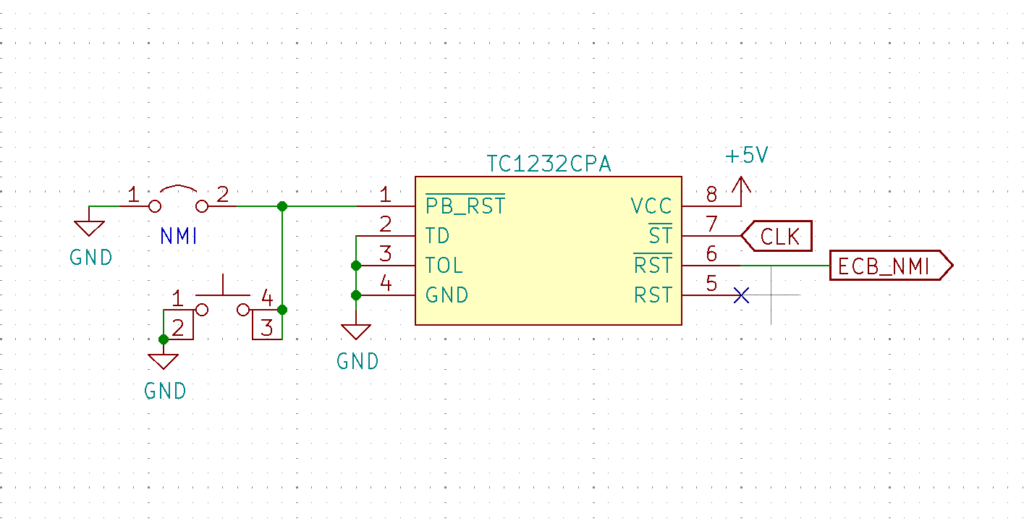
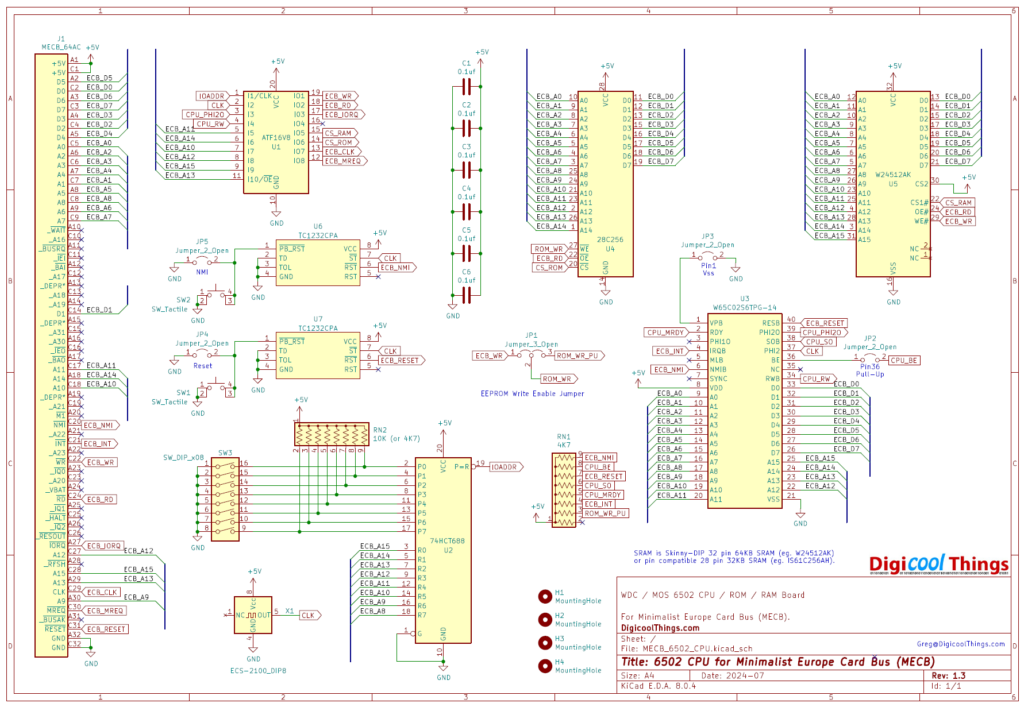
So, let’s take a look at the updated Schematic.
You can see that the debounced NMI push-button and external button header, is simply a duplication os the existing Reset TC1232 based circuit.
This, of course, only needs to be populated on the PCB if you actually want NMI Button functionality on your 6502 CPU Card!
Here’s a 3D render of the updated version 1.3 6502 CPU Card PCB.
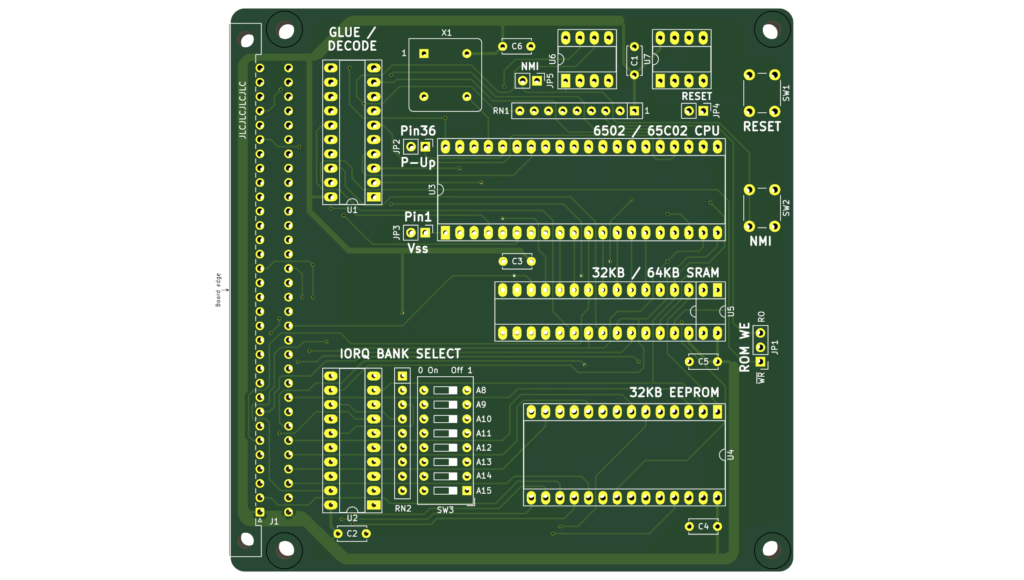
As you can see, the second TC1232 and NMI header fits nicely in the previously free PCB space, alongside the equivalent Reset circuit. And, I’ve routed an on-board NMI push-button to the card edge, just along from the existing Reset button.
Next, I get the first one assembled and tested.
Here it is, now fully assembled, and fully populated. I’ve transferred across the 2MHz Oscillator and the PLD from my older 6502 CPU Card. So, we should be all configured for the memory-map of my CreatiVision re-Creation.
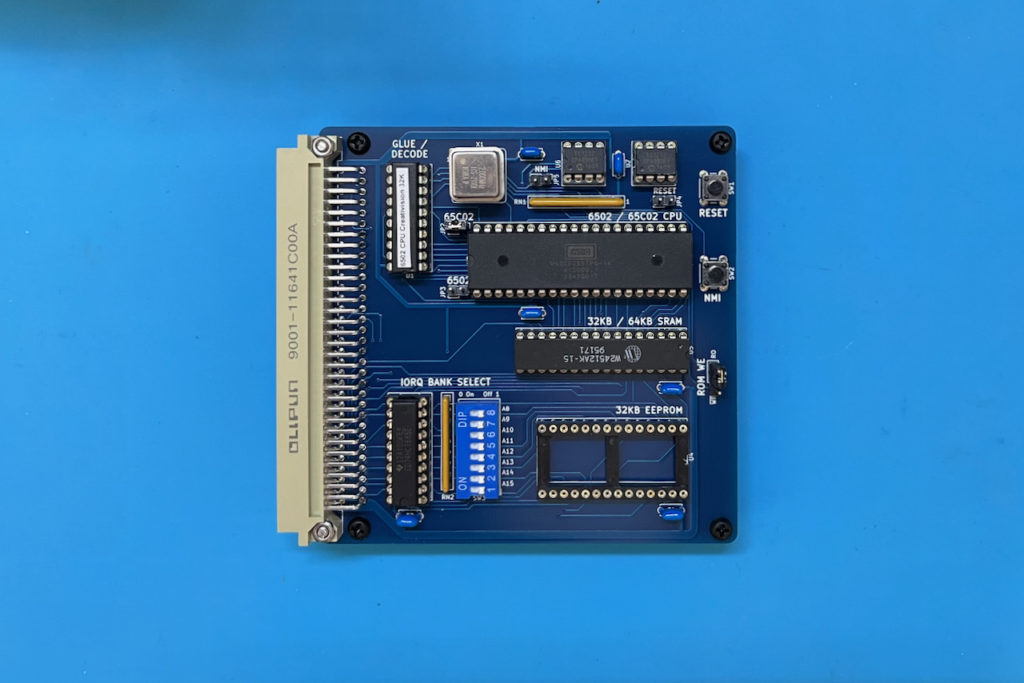
No ROM has been inserted, as the actual ROM code is on my separate MECB 1MB ROM Expansion Card.
This means that I can now easily test our new Non-Maskable Interrupt functionality by using existing CreatiVision code, to both check that we power-up successfully, and that I’m then able to start playing a game via a Non-Maskable Interrupt button push.
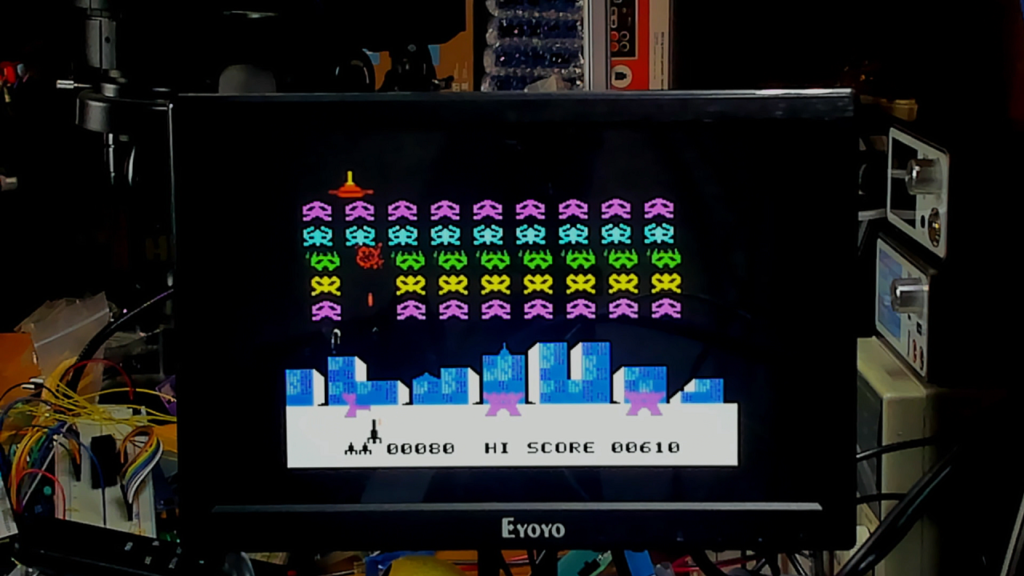
Next, I powered-up successfully, and had Sonic Invader again running in Attract mode, as you might have seen previously in the “Part 1” video of my CreatiVision re-Creation.
Pressing the new debounced NMI button successfully put us in play mode. So, all is working as expected!
So, it was then time for another game of Sonic Invader via my CreatiVision Controller, but this time without the bodged NMI jumper wire!
Okay, I’ll see you in the next post / video, where I plan to be introducing and covering my fun CreatiVision Controller journey.
Follow-up
During my testing of Sonic Invader, I noticed that the CPU Card hard Reset button also did actually work for getting me into Play mode. However, this doesn’t detract from the fact that the original CreatiVision Console only has a NMI button for “Reset”.
So, to ensure full CreatiVision software compatibility (and for other projects that might require a NMI button), I’m still happy to have now implemented a debounced NMI push-button on v1.3 of the 6502 CPU Card!